Introduction
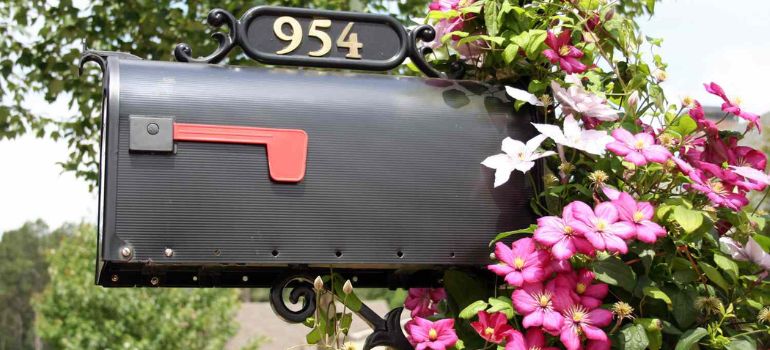
The mailbox, often an overlooked part of our homes, has the potential to be transformed into a stunning focal point with the right touch of nature. One of the most enchanting ways to achieve this is by introducing Clematis vines around the mailbox. In this article, we will explore the world of “Clematis Mailbox” gardening, guiding you through the process of selecting the perfect Clematis variety, preparing the area, and maintaining these beautiful vines year-round.
Choosing the Perfect Clematis Variety
When it comes to Clematis, variety matters. Different Clematis varieties thrive in various climates, so it’s essential to choose the right one for your location. Factors like sunlight, soil type, and regional climate play a crucial role in the success of your Clematis mailbox garden. Some popular varieties include the vibrant ‘Nelly Moser,’ the versatile ‘Jackmanii,’ and the delicate ‘Sweet Autumn.’ Explore local nurseries for varieties well-suited to your area.
Preparing the Mailbox Area
To ensure the success of your Clematis mailbox venture, proper preparation of the planting site is essential. Clematis prefers well-draining soil, so amend your soil with organic matter to enhance drainage. Additionally, Clematis enjoys a sunny location, so choose a spot with at least six hours of sunlight per day for optimal growth.
Planting and Initial Care
Now that you’ve selected the perfect Clematis variety and prepared the soil, it’s time to plant your vines. Follow these steps for a successful Clematis mailbox garden:
- Dig a hole twice the size of the Clematis root ball.
- Place the Clematis in the hole, ensuring the top of the root ball is level with the soil surface.
- Water thoroughly and mulch around the base to retain moisture.
During the initial growth phase, pay extra attention to watering and fertilizing. Keep the soil consistently moist, and provide a balanced fertilizer every few weeks to encourage healthy growth.
Training Clematis for Mailbox Elegance
Clematis vines have a natural climbing tendency, but a little guidance can enhance their elegance around your mailbox. As the vines grow, gently guide them towards the desired direction using garden ties. Pruning is also crucial for a neat appearance. Trim the vines in late winter or early spring to encourage new growth and maintain the desired shape.
Dealing with Common Issues
Like any plant, Clematis is susceptible to pests and diseases. Keep an eye out for common issues such as aphids, spider mites, and powdery mildew. Regularly inspect your vines, and treat any problems promptly. Consider using organic pest control methods to protect your Clematis without harming beneficial insects.
Year-Round Maintenance
Clematis isn’t a set-it-and-forget-it plant. To ensure the ongoing beauty of your Clematis mailbox, follow these maintenance tips:
- Spring: Prune lightly after the first bloom to encourage a second flush of flowers.
- Summer: Water regularly, especially during dry spells.
- Fall: Apply a layer of mulch to protect the roots from winter frost.
Clematis Mailbox Success Stories
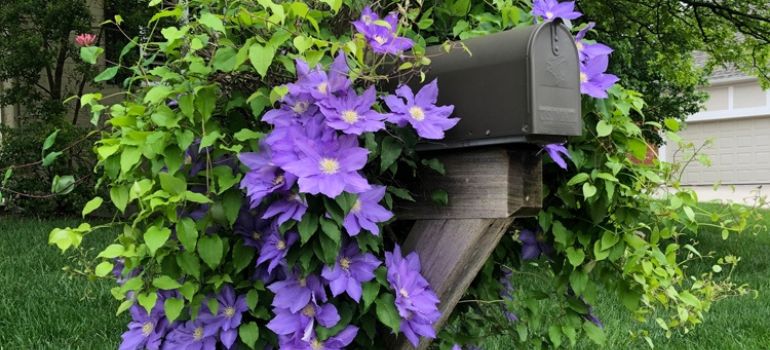
To inspire your Clematis mailbox journey, let’s explore some success stories from homeowners who have turned their mailboxes into works of art. From picturesque blooms to lush greenery, these real-life examples showcase the transformative power of Clematis.
Testimonial 1: “I never realized a mailbox could be so charming until I planted Clematis. Now, my mailbox is the talk of the neighborhood, thanks to the vibrant blooms that greet everyone who passes by.”
Testimonial 2: “Clematis not only added beauty to my mailbox but also attracted butterflies and hummingbirds. It’s like having a mini-garden that brings joy all year round.”
DIY Clematis Mailbox Decor Ideas
Beyond the vines, there are plenty of DIY projects to enhance the visual appeal of your Clematis-adorned mailbox. Consider these creative ideas:
- Hand-Painted Mailbox: Give your mailbox a personal touch with a hand-painted design that complements the Clematis blooms.
- Custom Mailbox Stand: Build a decorative stand for your mailbox, adding a touch of elegance to the entire setup.
- Solar-Powered Lights: Illuminate your Clematis mailbox garden at night with solar-powered lights for a magical touch.
Benefits Beyond Aesthetics
While the visual appeal of a Clematis mailbox is undeniable, there are additional benefits to this gardening choice. Clematis attracts beneficial insects like bees and butterflies, contributing to a healthier ecosystem around your home. By creating a welcoming environment for these pollinators, you’re not just beautifying your mailbox but also supporting local biodiversity.
Conclusion
In conclusion, transforming your mailbox into a botanical masterpiece with Clematis is a rewarding and surprisingly simple endeavor. By carefully choosing the right variety, providing proper care, and adding a personal touch with DIY decor, you can create a stunning focal point that enhances your home’s curb appeal. Embrace the beauty of nature and make your mailbox a conversation starter in your neighborhood.
Frequently Asked Questions (FAQs)
Q1: Can I grow Clematis around my mailbox in a colder climate?
A1: Absolutely! Choose cold-hardy Clematis varieties like ‘Arctic Queen’ or ‘Henryi’ for success in colder regions.
Q2: How often should I water my Clematis mailbox garden?
A2: Clematis prefers consistently moist soil. Water deeply once a week, and adjust based on weather conditions.
Q3: Are there specific pests that target Clematis?
A3: Common pests include aphids and spider mites. Use neem oil or insecticidal soap to address these issues without harming beneficial insects.
Q4: Can I plant other flowers around my Clematis for added color?
A4: Absolutely! Consider companion plants like lavender or daylilies to complement the Clematis blooms.
Q5: Is Clematis suitable for a mailbox with limited sunlight?
A5: While Clematis prefers sunlight, some varieties can tolerate partial shade. Choose shade-tolerant varieties for mailboxes with limited sunlight.